
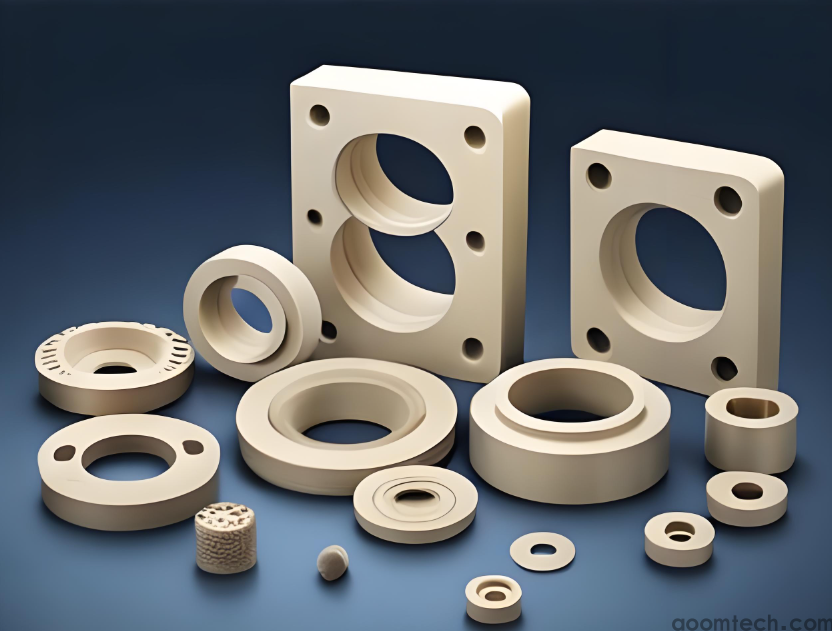
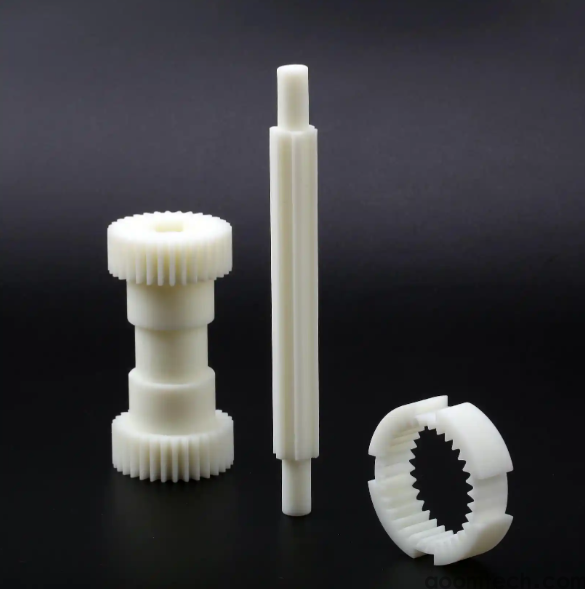
CNC Machining Plastic Parts
CNC Machining Plastic Parts
CNC machining plastic parts can give excellent accuracy, fast lead times, and production-grade performance, but plastics do not behave like aluminum or steel. They expand more with heat, hold heat longer, can absorb moisture, and can carry internal stress from the stock shape itself. That is why many common shop problems with plastics—melting, burrs, clouding, warping, and unstable dimensions—come from using “metal rules” on plastic jobs.
If you want reliable results, start with the right material, use plastic-specific tooling, control heat at the cut, and match the finish to the real function of the part. This guide covers the most practical points engineers and buyers ask about most: plastic material selection for CNC-machined parts, heat management in CNC machining plastic components, and surface finish techniques for CNC-machined plastic parts.
Why Plastic Parts Need a Different CNC Strategy
The first thing to understand is simple: plastics do not remove heat the way metals do. Curbell’s machining guide explains that plastics have lower thermal conductivity and higher thermal expansion than metals, so heat stays close to the cut instead of moving away through the workpiece. If heat builds up, the part can expand during machining, warp, crack, or miss tolerance. Good heat dissipation through the chips and stable fixturing are basic requirements, not optional extras.
There is also a second problem that many buyers do not see until parts start moving after machining: residual stress. Plastic sheet, rod, and tube can already contain stress from extrusion or other stock-forming processes, and machining can add more. Curbell notes that residual stress can later relax and cause warping, cracking, or parts drifting out of tolerance. In tight-tolerance work, this matters just as much as spindle speed or tool choice.
In practical shop terms, this means three things. First, do not assume your metal program will work on plastic. Second, do not clamp plastic as hard as metal. Third, do not judge dimensions only when the part is still warm from the machine. These small mistakes are behind a large share of quality complaints in CNC machining plastic parts.
Plastic Material Selection for CNC-Machined Parts
The best material is the one that matches the part’s real job, not the one that is simply easy to buy. Protolabs recommends starting with function first: environment, heat, chemicals, impact, wear, appearance, size, and cost. For many machined plastic parts, five materials cover most real-world needs: acetal, nylon, polycarbonate, acrylic, and PEEK.
Acetal is one of the safest choices when you need tight tolerances, low friction, wear resistance, and easy machining. Curbell describes acetal as strong, stiff, low-friction, easy to machine, and low in moisture absorption, which is why it is commonly used for gears, bushings, manifolds, and fixtures. If your part must stay stable and slide well, acetal is often the first material to check.
Nylon is strong and wear-resistant, but it absorbs much more moisture than many other engineering plastics. Curbell warns that nylon parts for wet environments should be designed with tolerance allowance for moisture-driven dimensional change, and their published data show measurable water absorption even over short exposure. Use nylon when toughness and wear matter, but be careful if the part must hold size in humid or wet service.
Polycarbonate is the stronger choice among clear plastics when impact resistance matters. Curbell describes it as a tough, transparent plastic with outstanding impact resistance and good machinability, making it a common choice for machine guards, sight glasses, and transparent manifolds. If break resistance is more important than the absolute best optical beauty, polycarbonate is usually the safer option than acrylic.
Acrylic gives excellent clarity, stiffness, and weathering, but it is more brittle and less chemically resistant than polycarbonate. Curbell notes that acrylic is easy to machine and has good dimensional stability, but also states clearly that it tends to be brittle and is not suitable for elevated temperatures. For display windows, covers, and cosmetic clear parts, acrylic is often the better-looking option, but it demands more care in handling and finishing.
PEEK is the premium choice for high temperature, chemical exposure, and long-term dimensional stability. Curbell identifies PEEK as strong, chemically resistant, low in moisture absorption, and able to keep stiffness at high temperature; it also notes that filled grades can offer very low thermal expansion, closer to metals. If the part must survive heat, sterilization, aggressive cleaners, or demanding service, PEEK is often worth the higher price.
A simple rule works well for many projects. Choose acetal for precision wear parts, nylon for tough wear parts where moisture is manageable, polycarbonate for impact-resistant clear parts, acrylic for cosmetic clarity and weather resistance, and PEEK for heat, chemicals, or regulated equipment. If you need very stable dimensions, prefer materials with low moisture uptake and low thermal expansion; Curbell specifically highlights low CTE and low moisture absorption as key requirements for tight-tolerance plastic parts.
One more practical point: even within the same plastic family, grade matters. For example, Curbell notes that cast acrylic has better chemical resistance and superior machining characteristics than extruded acrylic, while Ensinger points out that filled or lower-moisture plastics are often more dimensionally stable than moisture-sensitive grades. When a buyer says “just use nylon” or “just use acrylic,” that is usually still not enough information for a good machining decision.

Heat Management in CNC Machining Plastic Components
Heat management in CNC machining plastic components is where many jobs are won or lost. The most common heat-related failure modes are melted edges, smeared surfaces, clouding in clear parts, chips welding back to the part, and holes going undersize because the material softens and rebounds. Curbell’s general plastic machining guide says heat reduction is critical, especially in drilling, and lists cracks, crazing, melted surfaces, poor finishes, and dimensional change as signs of bad drilling practice.
The basic goal is not “run colder at any cost.” The real goal is to cut cleanly so the chip carries heat away. Ensinger’s processing guide says dry machining is generally recommended, with heat leaving through the chips, and notes that if cooling is required, compressed air, spray mist, or water-soluble coolants can help. Their guide also warns that poor heat dissipation, excessive force, and heat input can cause warping and cracking.
If you are asking how to prevent melting in CNC machining plastic parts, the most dependable methods are straightforward. Use a sharp tool. Keep chips moving. Avoid rubbing. Match feed and speed so the cutter shears instead of wipes. Onsrud’s plastics routing FAQ says heat is the cause of rewelding, and recommends higher feed and/or lower spindle speed when heat buildup starts. In acrylic work, the same company notes that excessive spindle speed without a matching feed increase can melt the plastic or smear the finished edge.
Drilling needs extra attention because it traps heat more easily than open milling. Curbell recommends sharp drills, supported exit surfaces, reduced feed near breakthrough, and peck drilling for deep holes so chips can leave and heat can escape. Ensinger similarly recommends frequent drill withdrawal for chip removal and cooling. If a plastic part is cracking near holes, drilling technique is one of the first places to check.
For thin, flat, or flexible parts, heat control and fixturing work together. Over-clamping can distort the part during machining, but weak clamping allows vibration and rubbing that create even more heat. Boedeker recommends adequate fixturing, and Curbell notes that high spindle speeds are possible only with proper clamping and that care is needed to prevent deformation or springing. In real production, a vacuum fixture, soft jaws, or sacrificial support often makes a bigger difference than chasing one more change in RPM.
Tool Selection and Process Planning for Better Results
Good tooling for plastics usually looks simpler and sharper than tooling for metals. Boedeker’s milling guidance recommends 2 to 4 flutes for most plastics, a 30° to 45° helix angle, positive rake, and enough relief to prevent rubbing. For turning, Curbell recommends fine C-2 grade carbide inserts, polished top surfaces to reduce material build-up, and generous relief angles. In short: sharp edges, good chip evacuation, and low rubbing are the core ideas behind tool selection for CNC machining plastic parts.
If you are comparing the best tools for CNC machining acrylic and polycarbonate parts, official Onsrud guidance is useful. Their plastics FAQ recommends single-edge O-flute tools for soft plastics and notes that material-specific solid carbide tooling improves finish. Their acrylic finish guide says single-edge spiral O-flutes usually give the best edge finishes in smaller diameters, while larger diameters can benefit from low-helix multi-flute tools. Onsrud also states that polished flutes help produce sharp cutting edges and easier chip evacuation.
Tool geometry should also match the plastic type. Onsrud explains that soft plastics usually respond best to O-flutes, while harder plastics often machine better with modified O-flute or straight rake face geometry. That is a useful way to think about process planning: do not ask for one “plastic tool,” ask what kind of plastic chip you are trying to make. Soft materials want clean evacuation of larger chips; harder materials often create smaller, more brittle chips and need a geometry that does not crater the edge.
Program structure matters too. Onsrud warns against dwelling in the cut because stop-and-go motion adds heat and can cause chips to reweld to the part or the tool. For acrylic, they recommend roughing and finishing as separate steps when appearance matters, and they also stress that every material-and-tool combination has a narrow “sweet spot” for chip load if surface finish is important. This is why plastic jobs that look easy on paper often need a short test cut before production.
Surface Finish Techniques for CNC-Machined Plastic Parts
Many buyers expect a clear plastic part to come off the machine looking like molded glass. That is usually not realistic. Protolabs notes that acrylic and polycarbonate are naturally transparent, but machining leaves a matte finish that can be polished to restore clarity. The same company states that standard as-machined surface roughness is about Ra 3.2 µm, and additional finishing passes can reduce roughness to Ra 1.6, 0.8, or 0.4 µm, though tighter finish targets increase cost.
That leads to a simple decision rule for surface finish techniques for CNC-machined plastic parts. If the part is functional and appearance is secondary, as-machined or a light finishing pass is often enough. If you want a uniform non-glare look, bead blasting can hide tool marks and create a matte or satin surface, but Protolabs warns that blasting can affect critical dimensions, so important holes and fitting surfaces may need masking or no blasting at all.
If you need true transparency on a window, lens cover, or fluid-view component, plan for polishing as a separate operation. Protolabs and Hubs both identify polishing as the path back to optical clarity after machining clear plastics, and Protolabs notes that cosmetic finishing can add substantial cost. In other words, if optical clarity matters, specify it early. Do not assume the shop will “make it clear later” at no cost.
For acrylic, be careful with flame polishing. Plaskolite guidance published by Curbell says flame polishing acrylic is generally not recommended because it can leave the surface highly stressed and lead to crazing or later failure. Mechanical edge finishing, controlled sanding, and buffing are safer choices when long-term durability matters. This is one of those details that separates a part that looks good on day one from a part that still looks good months later.
How to Hold Tolerance and Keep Quality Consistent
Dimensional stability is a system issue, not only a machining issue. Ensinger points out that moisture uptake, heat input, stress relaxation, and even storage conditions can all change part dimensions. Curbell adds that close-tolerance plastic parts should be manufactured in temperature-controlled environments and that nylon or other high-moisture materials may need conditioning before processing. If tolerance is tight, the part, the shop, and the inspection room all need to be part of the plan.
When tolerances are especially demanding, rough machining followed by stress relief can help. Curbell’s 2023 tolerance paper says that some plastic parts should be machined to a rough shape, then allowed to relax for several days before final machining; it also notes that an annealing step can be added if even lower stress is required. This is highly practical advice for larger plates, thick sections, or parts with asymmetrical pockets that tend to move after the first setup.
Fixturing also affects accuracy more than many buyers expect. Curbell explains that tight clamps or vises can create residual stress in plastics during machining, and suggests methods such as clamping on sacrificial stock or even using double-sided tape in some cases to avoid clamp-induced distortion. If a supplier says a thin plastic part needs custom fixturing, that is often a sign of good process control, not unnecessary cost.
Finally, specify quality in a way the shop can act on. Ask for the critical dimensions, the real operating temperature, the material grade, the required surface finish, and whether the part will see moisture or chemicals in use. If you leave those points open, the shop may still make the part, but it may not make the right part. This is especially true in CNC machining plastic parts because the material’s behavior in service can be very different from its behavior on the machine table.
A Practical Checklist Before You Order Plastic CNC Parts
Before sending a drawing for quote, it helps to answer a few questions in plain language. Doing this reduces rework, changes, and quality surprises later.
What matters most for this part: size stability, strength, wear, clarity, chemical resistance, heat resistance, or cost? Material choice should follow this answer.
Will the part see water, humidity, steam, or cleaners? If yes, avoid making a tight-tolerance part from a moisture-sensitive material unless you have allowed for growth.
Is the part clear for looks, or clear for true optical use? If you need visual clarity, specify polishing. Machining alone usually leaves a matte surface on clear plastics.
Are there deep holes, thin walls, or large flat pockets? These features increase the risk of heat buildup, distortion, and stress relief. Ask how the shop will fixture and cool the part.
Does the shop use plastic-specific tools and process data? Good answers include O-flute or other plastic-specific geometries, sharp carbide tools, chip evacuation, and temperature-aware inspection.
The main lesson is simple. Successful CNC machining plastic parts is less about pushing the machine harder and more about respecting how each polymer behaves. When you match the material to the job, control heat, use the right tool geometry, and plan the finish and tolerance strategy early, plastic parts can be accurate, clean, and repeatable in both prototype and production work.
 How to Ensure Precision in CNC
 Small Batch Precision CNC Mach
 What surface finish can CNC ma
 CNC Machining Tolerance Settin